Showing posts with label Crafts. Show all posts

Monday, July 15, 2013

Burlap Curtain

My husband and I are redoing our kitchen in our cabin in the mountains. I have been looking at curtains for weeks and have gone back and forth about them. I really liked this cute little strawberry curtain and thought it would go perfect with my colors. All my friends hated it, but I loved it so I was about to pull the trigger and buy it and then I decided it wouldn't really match out pot rack we made out of an old vintage sled. So basically I was back to the drawing board. 

While I was at Home Depot one night I just decided I would make my own out of burlap. We went to the gardening section and bought a HUGE roll of burlap for $12. Then we went to Wal-Mart and I bought some lace, stitch witchery, and a tension rod. 

Thankfully the width of the burlap was exactly what I needed for the size of the window. I rolled out a piece that was double the length and hemmed both ends with the stitch witchery. I laid that over the tension rod and tied it together in the middle with the lace. 

I felt like it just wasn't enough so I decided to make a valance. I measured how long I wanted the valance and rolled out double that. I only hemmed one end since the other wouldn't show. I just laid it right over the curtain. Now when I untie the curtain to close it, it looks much better with the valance. 

The curtain ended up coming to less than $9. I used less than a 4th of the burlap roll so I can use it for other projects (I see placemats in my future). I have a ton of lace and stitch witchery left. Really the biggest cost was the $4 tension rod for Wal-Mart! 

This is an awful picture from my phone, but you get the idea! Nothing fancy, but it;s what I wanted! 


Monday, May 13, 2013

Ikea Fram Make Over


2 things...Number one, I have been wanting this picture frame from Ikea for probably 4 years now!  Number two, I had NEVER glazed anything until this project.

Not sure why it took me so long to buy this frame. It was only $29 and it's HUGE! Every time I would go to Ikea I would walk buy it and think to myself, "should I get it?" When we moved out to the cabin I decided I wanted to do a fun eclectic gallery wall above our couch. I knew this frame would be the perfect fit for the wall. With that said, my sister and I headed out to Ikea and that frame was actually on my list this time! When I got there I found out it was on sale for $27!! I am SO glad I bought it because I looked online and they don't sell it anymore. They do however sell a smaller, white version of it. 

Now to the glazing part. I have always had glazing visions in my head, but have never really had the perfect project for it. When I bought this frame I wasn't sure if I was going to leave it black or paint it. I wanted it to really pop off our pine walls so I decided to paint it cream and figured this would be the perfect time to glaze something. 

I bought my glaze at home depot. I read online somewhere that you needed to put the color paint in the glaze that you wanted it to be. I just assumed the glaze was brown, not sure why! When opened up the glaze much to my surprise it was white. Thank goodness I had some leftover stain from my project earlier in the day. So I dumped about 2 cups of glaze in a bowl and added a little stain to it. It became gray so added more stain until I really liked the color. To mix it I had to use whisk because the glaze is very thick and the stain was super thin. 

At first I was a little nervous since I had never done this AND did not feel like reading the directions! I took a little paint brush and started in the cracks. Then I just took a paper towel and wiped off what I didn't like. After about 1 minute I was no longer nervous and went to town on that thing!

Warning....glazing might be like meth, it only takes one time and you are addicted. 

2 side notes.... Number one, I needed about 3 tablespoons of glaze for this project, NOT 2 cups. Number 2, you can't really mess it up. I was so afraid at first I was going to mess it up, but as long as you have a paper towel there to wipe up stuff you don't like, you are good to go!


Sunday, May 12, 2013

Pantry Crates.....


I went from a huge pantry with TONS of storage and doors to a small pantry with NO doors. That means that my pantry is open to everyone that walks in my kitchen. If you ever saw my old pantry you would know that no one should have to look at that kind of mess! 

Slowly I am trying to organize it and make it look good. I bought 6 of the above crates from Lucky Clover Trading for only $12 a piece. I decided to stain them dark and add chalkboards that I already had from my sister's baby shower 5 years ago....sometimes it pays to be a packrat right!?! The stain I used was from Home Depot and it was Kona.


Tuesday, January 29, 2013

Verse of the Week

My latest craft! I made this for my best friend for her birthday. She had pinned it on pinterest recently. 

I already had the ivory spray paint, the chalkboard spray paint, and ribbon. I bought the frame for $4...it was half off at Michaels. I bought the back board for $4 and the gold paint pen for $4 at Michaels. I will be able to use the paint pen for many other projects, in fact I am using it right now!! This little project came out to less than $10. It was very easy to make. The hardest part was writing with the paint pen. I have THE worst handwriting on the planet and I was so nervous I was going to mess it up! 

I only got this picture with my old cell phone. You get the idea though!


Monday, December 17, 2012

DIY Christmas Coasters

My sister in law made me these really cute coasters last year for my Christmas present. She used tile,  mod podge, scrap book paper, and cork drawer liners. They were so cute and seemed easy so I decided to make them for my neighbors this year. 

These were so easy to make and SOOO cheap. I bought a pad of Christmas scrapbook paper that had 24 sheets in it for $5.99. That's 25 cents a sheet which is really cheap. Then I bought a big bottle of the matte mod podge. I think that was about $8, but it has enough in there to probably last me a year! The tile was 16 cents a piece at Home Depot, and I already had the cork draw liners cause I made placemats with them last Easter.

First I put a layer of mod podge on the tops of the tile. Then I laid the paper on it and let it dry. I then added 4 layers of mod podge, letting each layer almost dry in between. I let them dry over night. Then I flipped them over and added a layer of mod podge to the bottom and added the cork liner and VOILA!...done! So dang easy! I might be making these a lot now!!


Thursday, December 6, 2012

Christmas Decor

This year I am not decorating. I have been so busy lately (JUST took down my Halloween stuff today) and will continue to be busy until December is over. Also, we will be spending the week of Christmas at our cabin this year so we won't even be home to enjoy it. It takes a lot of time to get all that stuff out of the attic and even more time to put it up. So I made the decision to forgo it this year. 

So, here are my decorations for last year! I love Christmas so much and I am so sad that I don't get to enjoy the decor this year, but at least I have pics!!

I love putting the garland and lights up the staircase! So pretty! 


Last year I did something new. I have urns on either side of the door. When we
went to get out tree they had a ton of scraps from the trees and let me have them for
free. I grabbed a ton. I put those down first, then cut some of the holly branches in our 
front yard, some pinecones I picked up on the ground, and some pine tree
 branches. Then I added the large ornaments on top of that. 
I loved how it turned out and it was cheap!


 I used those same scraps and stuck them in my grapevine wreath that I use all year long for different holidays (Easter, Halloween). 

 This is our little tree. It is filled with ornaments that we 
get when we travel. We have been doing this since 2005. 

 And of course our big tree. I love this tree!! 

Tuesday, December 4, 2012

Christmas Wrapping

I love wrapping presents. I do get very stressed out when it doesn't quite go my way though!! I want it to be perfect and sometimes that's just not possible. 

Last year I did a very simple wrapping job. I took brown paper sack style paper, adding a thinner version of the ribbon I had on my tree, then added some sprigs from the tree. It was elegant, yet natural and matched the tree very well!


Wednesday, October 31, 2012

Halloween Decor

I never really decorate for Halloween. This year I decided with all the pinterest front porches I wanted to. For some reason I really wanted to do something with black crows. I had these twigs in my urns that I had used for Easter earlier in the year so I spray painted those black. Bought some orange and black pumpkins, a lot of black crows, and some spider web stuff. 

Then it was time to do the wreath. I bought a bunch of black feather boas. Feather boas aren't that cheap...$10 at Hobby Lobby and I needed 4. So I had a 40% off coupon at Hobby Lobby for one item. I went back 4 days in a row LOL!!! Then I bought orange Christmas ornaments and they were already 50% off. Halloween ribbon was also 50% so I snagged some polka dot ribbon with orange and green since I had bright green hostas in my urns already to make a big bow on top!

I loved the way it turned out!


Wednesday, August 15, 2012

Front Door Frame


It was time for me to change up my front door wreath. I normally have a really big grapevine wreath that I change up for every season. This time I wanted to do something different. 

I had a dark brown frame that I really liked. I didn't want it to be brown since my front door is the same color. I had some extra spray paint in the garage in cream so I decided to go with that. I spray painted it and after it dried I took some steel wool to it and made it look antique.

Next, I wrapped the back of the frame in some material. 

After that I glued a gold, antiqued T too it. The T was originally $9.99 at Hobby Lobby, but I had a 40% off coupon so I used that. 

I also glued an embellishment flower that I found in the clearance section at Hobby Lobby to the lower right corner to add a little summer to it! 

Since the frame was old, and the spray paint was already in the garage, I spent a total of $10 on this. I love making stuff cheap!


Saturday, July 21, 2012

Faux Anthropologie Zinc Letters

I have always loved these letters at Anthropologie. The thought of spending $40 on 2 letters I did not love! They sell cardboard block letters at Hobby Lobby and a silver, metal looking spray paint at Home Depot. The letters at Hobby Lobby were $2.49 a piece and the spray paint was $8. So I spent a total of $13. I only used a tiny bit of the spray paint so I will be able to do many more project with that. I would say these ran me about $3 a piece with the amount of spray paint I used.


Cardboard Letters $2.49 a piece at Hobby Lobby


Hammer spray paint in silver $8 at Home Depot 

Finished Product....I put them in front of my stovetop just to 
take a picture, but I am going to go back to 
Hobby Lobby and buy an E, A, and T to put there! 
The picture makes them look gray and not metal, but they
have a metal look to them for sure. You can not tell they are
cardboard and just spray painted. 
These have their own special place, but that's another
blog post!


Thursday, April 12, 2012

Easter Table Decorations


I love Easter decorations! I love all the colors and the signs of spring. This year we had Easter lunch at my house. My sister and her family came along with my mother from Arkansas. I wanted the table to look extra special without having to break the bank.

My main dishes are white so those were an easy choice for Easter. I only have one set of placemats and they are red. I only have one set of napkins and napkin rings and they are both black. That was NOT going to work for Easter. So I had to get creative.

About a year ago my dog, Buster, chewed a little whole in one of my pillow covers. I just recently got a new one to replace it and since it was a buttercream yellow I thought it would be perfect for the Easter table.....but where?

I knew I wanted it to be a sort of country looking table, not modern. So, I cut out strips of the yellow pillow cover about 1 inch wide and 6 inches long. I took plain white paper towels to wrap the silverware and then just tied the pillow cover strips around them. The pillow covers were made of a thick linen like material so it worked out perfect. They were frayed a little bit, but I liked it. It gave it that country look I was going for.


Now what was I going to do for the place mats? Well I went to the grocery store and bought 2 rolls of cork drawer liners. The rolls I bought were only $3 a piece and I made 3 placemats out of each roll bringing them to a total of $1 each! They worked out perfect with the look I was going for!


Next was the decor. I have a ton of mason jars laying around the house as well as a roll of jute twine. That is typically my go to vase of choice when I am making a flower arrangement. Today I wanted to spice it up a little. So, I took some more of the pillow cover fabric and wrapped it around the vase and added the juste twine around that. I have a huge snowball tree in my front yard so I thought those would be perfect. I bought 6 tulips at the store for $5 to add a little more color to the table.


The menu...I normally don't do this! I had seen Easter Brunch Menus all over the place in the last couple of weeks so I decided to do my own. This was the fun part! I love turning ordinary food into something that sounds amazing! (Isn't that what the restaurants do?) Like for instance The Creamy Mushrooms with Hericot Verts topped with fried onion strings and cheddar cheese...that is just my recipe for a green bean casserole. Yes, it's not your typical casserole, but it's also not very fancy either! Change the words green beans to the French translation, make French's Fried onions sound way more appetizing and VOILA!, you have a fancy menu! Adjictives are your friends as well! Take a look at the recipes here.


Monday, March 19, 2012

Easter Decorations

St. Patrick's day is over so it's time for Easter decorations. I love Easter. I always have. I think it has to do with what Christ did for us, peanut butter eggs, getting huge Easter baskets from my grandpa when I was a little girl, getting a new dress, the colors, and hunting down those dang eggs. I really never believed in the Easter bunny. I couldn't figure out what a human sized bunny that hid eggs in your yard and left you a basket full of goodies had to do with Jesus dying for our sins. All I knew is that I loved it. I know that sounds so terrible. I really do love the commercial side of Easter....don't judge! Even though I love the commercial side of it, I NEVER, EVER forget the reason we celebrate.

This weekend was a BEAUTIFUL! I was able to plant some flowers on my porch and decorate for Easter. I gave up Pinterest for lent so it was really nice to do something creative and to know I can still do creative things without the help of Pinterest LOL!!! I took these pictures with my phone...I have been doing that a lot lately since my camera card has been in the back of my computer from editing photo sessions. But you get the idea even though the quality of the photo stinks!


Monday, January 23, 2012

Happy Mardi Gras

This weekend I had my niece over. I like to do theme nights when she is here. Since Mardi Gras is coming up I decided to go with that. She had a very good time! We read a book about Mardi Gras, made a King Cake, made a float, had a Mardi Gras colored meal(I didn't get a picture, but we made yellow curry coconut chicken, broccoli, and purple potatoes), colored a mask, and watched The Princess and the Frog!

To make the King Cake, I took two containers of Crescent Rolls and laid them out flat. I pinched together all the seams. I brushed melted butter on them and sprinkled sugar and cinnamon on them. Then I rolled each one up and created a ring. I baked on 325 degrees instead of 350 because I didn't want the outside to get done before the inside. I then added the colored frosting. Normally I do white icing and colored sugar, but I was out of yellow sugar!


Saturday, August 27, 2011

Flowers from the yard

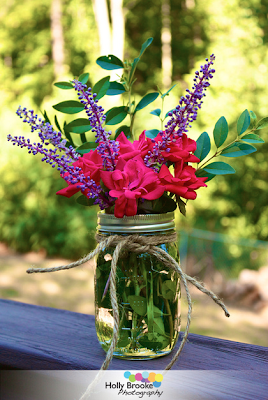
It's so easy to grab some flowers from the yard and spruce them up. Just put them in a mason jar and add some jute and voila!


Sunday, May 8, 2011

Remodeled Ikea Chairs

We bought 4 of these chairs and a table forever ago at Ikea. I was planning on taking them up to our cabin, but decided I might use them for my new photography business instead. I am done with 2 and have 2 more to paint. I am going to paint the other ones pale yellow and a salmon color. Can't wait to finish them and use them in a session.


Wednesday, April 20, 2011

All I have to say is HOW CUTE!!!!

So I love these cute little yarn things. I looked them up to buy one....$75! Are you kidding me?!?!?


I went to hobby lobby and bought $65 worth of yarn and made 2 of them and still have enough yarn to make 2 or 3 more! I was able to make them in an hour on my lunch break! The woman selling these for $75 is banking!!


Monday, April 11, 2011

Chalkboard

A while back I bought a beat up frame and painting at a consignment store with intentions of making a chalkboard out of it. I finally did it on my lunch break today. I will be using it soon for an engagement photo shoot. All I did was use painters tape and some magazine pages to cover up the frame and then I spray painted it with chalkboard paint and Voila!!!!! It was $3 for the frame and $5 for the paint and the can is still full for many other projects.


Monday, August 17, 2009

E is for Emily


I made this E tonight to put on top of my niece, Emily's, cupcake tower for her first birthday.  I am not a huge fan of the green, but it was all they had in the spray paint section at Home Depot.  I was looking for something a little more limey. (Is limey a word?)  Oh well, it will work.  I am going to work on more decor for the party this week; ribbon garland, ribbon chandeliers, and a banner.